This is one of my most favorite stamp sets in the current CTMH Annual Inspirations Idea Book. I love the versatility it allows when adding color, yet it also looks classic just stamping it and not adding colors!
This article is taken from the CTMH Blog.
When you find a stamp you love, you tend to use it over and over (and over) again—we get it!  Today we’re sharing some fun ideas to showcase one stamp in four different ways so it’s not the exact same every time. To show you what we mean, we’re going to use the darling “HELLO” stamp from our Dreamin’ Big—Scrapbooking stamp set.
The following stamping techniques range in skill levels—try them all to find your favorite!
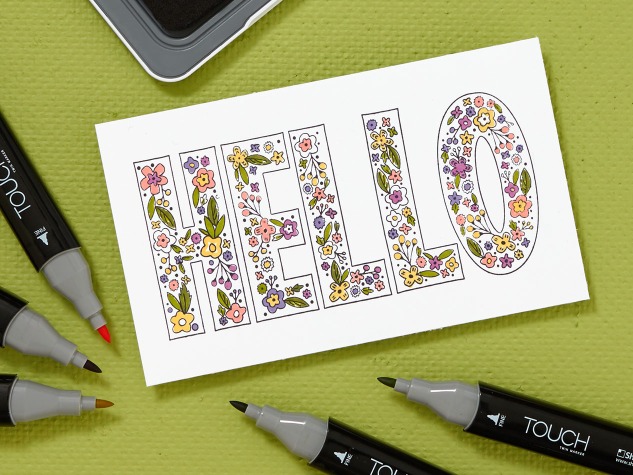
When going for a saturated and vibrant look, especially in small details, ShinHan™ Touch Twin™ markers are an excellent choice. They are bright, smudge-proof, and, because they are alcohol-based, they are easy to blend. The fine tip on each marker is ideal for coloring intricate images, like those flowers and leaves in our stamp. To ensure a crisp outline of your stamped image, use our permanent Archival Black Exclusive Inks™ stamp pad. Unlike other inks, Archival Black won’t smear or smudge when you apply color.
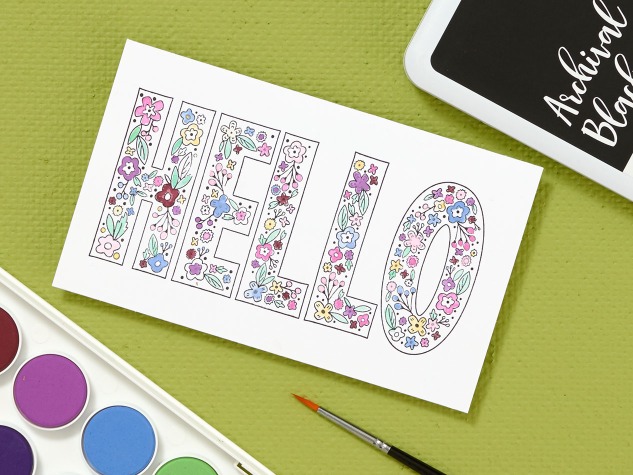
For a softer look, use watercolors! Once again, stamp your image using Archival Black ink. Because this ink is waterproof, it won’t run when you apply your paint. In this example, we used a fine tip brush to color the small details.
Ready to add some texture? Try embossing! For those of you who are new to this technique, embossing powder is a special powder that, when heated, melts to form a raised surface. To start, stamp your image using the VersaMark™ ink pad (embossing ink), which will create a clear, wet-looking print of your stamp. While the ink is still wet, cover it with embossing powder and carefully shake off any excess. In our example, we used white embossing powder to make our image pop on the colored cardstock. Use a craft heater to dry and seal your design. Craft heaters blow extremely hot air with a low air current, which keeps the powder from blowing right off—hair dryers are not a good substitute!
After your powder is set, add some shimmer using our gold and clear shimmer brushes. When you use these, prep your brush before you do! You want to squeeze your brush over scrap paper until the shimmery liquid comes out. Keep brushing it on the paper until you get the consistency you want on your brush before coloring in those details.
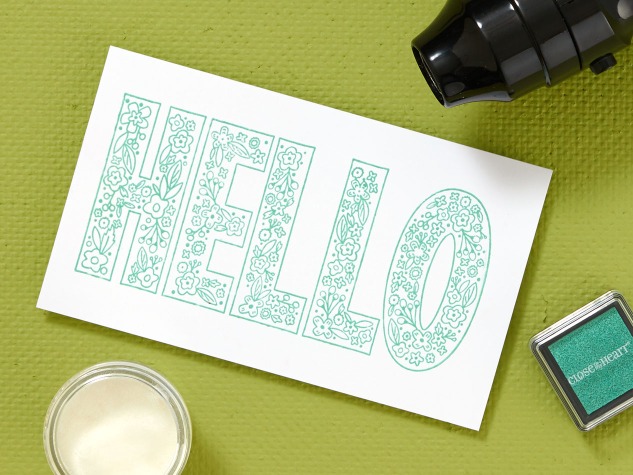
Okay, here’s technique we’re really excited to share! Did you know that you can pair our Exclusive Inks™ mini pigment pads with clear embossing powder to emboss in any color you want? Yes, really! Stamp an image with your choice of pigment ink, cover it with clear embossing powder, and then set it with your craft heater! It’s that simple! You can match all of our exclusive colors perfectly using this last technique!
Of course there are many more ways to customize a stamp. That’s the best thing about finding a great stamp—you can use it again and again without it being identical each time. Give these techniques a try and have fun dolling up your current fave. 
Recipes
Hello—Markers
D1714 My Acrylix® Dreamin’ Big—Scrapbooking Stamp Set, 1385 White Daisy Cardstock, Z3271 Archival Black Exclusive Inks™ Stamp Pad, Z2453 ShinHan™ Touch Twin™ Lavender Marker, Z2454 ShinHan™ Touch Twin™ Leaf Green Marker, Z2455 ShinHan™ Touch Twin™ Light Orange Marker, Z2459 ShinHan™ Touch Twin™ Pastel Green Marker, Z2462 ShinHan™ Touch Twin™ Peony Purple Marker, Z2463 ShinHan™ Touch Twin™ Sap Green Marker
D1714 My Acrylix® Dreamin’ Big—Scrapbooking Stamp Set, 1385 White Daisy Cardstock, Z3271 Archival Black Exclusive Inks™ Stamp Pad, Z2453 ShinHan™ Touch Twin™ Lavender Marker, Z2454 ShinHan™ Touch Twin™ Leaf Green Marker, Z2455 ShinHan™ Touch Twin™ Light Orange Marker, Z2459 ShinHan™ Touch Twin™ Pastel Green Marker, Z2462 ShinHan™ Touch Twin™ Peony Purple Marker, Z2463 ShinHan™ Touch Twin™ Sap Green Marker
Hello—Watercolors
D1714 My Acrylix® Dreamin’ Big—Scrapbooking Stamp Set, 1385 White Daisy Cardstock, Z3271 Archival Black Exclusive Inks™ Stamp Pad, Z3132 Watercolor Paints, Z3188 Paintbrush Set
D1714 My Acrylix® Dreamin’ Big—Scrapbooking Stamp Set, 1385 White Daisy Cardstock, Z3271 Archival Black Exclusive Inks™ Stamp Pad, Z3132 Watercolor Paints, Z3188 Paintbrush Set
Hello—Embossed
D1714 My Acrylix® Dreamin’ Big—Scrapbooking Stamp Set, X5776 Peacock Cardstock, Z891 VersaMark™ Ink Pad, Z2068 Ranger™ White Super Fine Embossing Powder, Z555 Craft Heater, Z3293 Shimmer Brush—Clear, Z3316 Shimmer Brush—Gold
D1714 My Acrylix® Dreamin’ Big—Scrapbooking Stamp Set, X5776 Peacock Cardstock, Z891 VersaMark™ Ink Pad, Z2068 Ranger™ White Super Fine Embossing Powder, Z555 Craft Heater, Z3293 Shimmer Brush—Clear, Z3316 Shimmer Brush—Gold
Hello—Embossed Pigment
D1714 My Acrylix® Dreamin’ Big—Scrapbooking Stamp Set, 1385 White Daisy Cardstock, Z2507 Sea Glass Exclusive Inks™ Mini Pigment Pad, Z2088 Ranger™ Clear Super Fine Embossing Powder, Z555 Craft Heater
D1714 My Acrylix® Dreamin’ Big—Scrapbooking Stamp Set, 1385 White Daisy Cardstock, Z2507 Sea Glass Exclusive Inks™ Mini Pigment Pad, Z2088 Ranger™ Clear Super Fine Embossing Powder, Z555 Craft Heater


No comments:
Post a Comment